Introduction:
Are you a passionate gamer or aspiring game developer? If so, then developing 2D games using Unity is a great way to express your creativity and build your skills. Unity is a powerful game engine that allows you to create high-quality games for various platforms including PC, mobile, and consoles. In this guide, we will walk you through the process of how to start developing 2D games using Unity.
Chapter 1: Setting up your Development Environment
Before diving into the world of game development, it’s important to set up your development environment. This includes installing the necessary software and hardware. In this section, we will cover the following topics:
-
Installing Unity
-
Setting up your computer for game development
-
Choosing the right tools and plugins
Chapter 2: Designing your Game
Once you have set up your development environment, it’s time to start designing your game. In this section, we will cover the following topics:
-
Creating a game concept
-
Designing game assets
-
Setting up gameplay mechanics
Chapter 3: Implementing Game Logic
Now that you have designed your game, it’s time to start implementing the game logic. In this section, we will cover the following topics:
- Writing code for game logic
- Debugging and testing your code
- Optimizing your game performance
Chapter 4: Publishing Your Game
Once you have developed and tested your game, it’s time to publish it on various platforms. In this section, we will cover the following topics:
- Choosing the right platform for your game
- Exporting your game for different platforms
- Marketing your game
Summary:
Developing 2D games using Unity is a rewarding experience that can help you build your skills and express your creativity. With the right tools, resources, and guidance, anyone can start developing games. We hope this guide has provided you with all the information you need to get started on your journey to becoming a game developer.
Chapter 1: Setting up your Development Environment
Before diving into the world of game development, it’s important to set up your development environment. This includes installing the necessary software and hardware. In this section, we will cover the following topics:
-
Installing Unity
-
Setting up your computer for game development
-
Choosing the right tools and plugins
Installing Unity
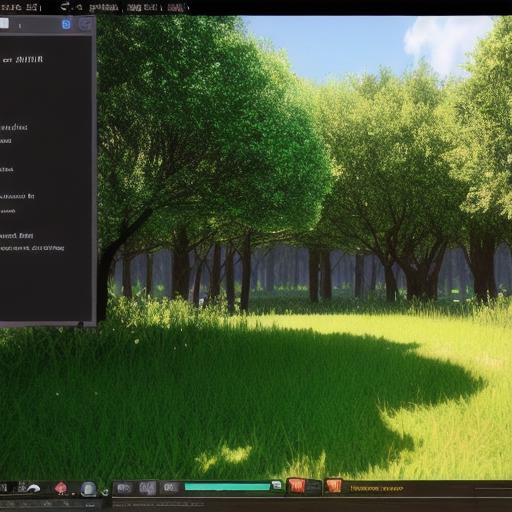
Unity is a game engine that allows you to create games for various platforms including PC, mobile, and consoles. To install Unity, follow these steps:
- Visit the Unity website (https://unity.com/) and download the latest version of Unity.
- Run the installer and follow the on-screen instructions to install Unity on your computer.
- Once the installation is complete, open Unity and create a new project.
Setting up your computer for game development
To ensure that your computer is optimized for game development, you need to make sure it has the necessary hardware and software. In this section, we will cover the following topics:
-
Hardware requirements
-
Software requirements
-
Upgrading your computer
Hardware requirements
The hardware requirements for game development can vary depending on the complexity of the game you are developing. However, there are some basic requirements that you need to consider when setting up your computer for game development:
- CPU (Central Processing Unit): A minimum of a dual-core processor is recommended for game development.
- RAM (Random Access Memory): At least 8GB of RAM is recommended for game development.
- Graphics card: A dedicated graphics card with at least 2GB of VRAM is recommended for game development.
- Storage: You will need at least a 500GB hard drive or SSD to store your game assets and code.
Software requirements
In addition to the hardware requirements, you also need to make sure that you have the necessary software installed on your computer. This includes:
- Operating system: You will need a Windows operating system (XP SP2 or later) or Mac OS X 10.6 or later.
- Text editor: A text editor like Visual Studio Code or Atom is recommended for writing code.
- Version control: It’s recommended to use version control software like Git to manage your code and assets.
- Integrated Development Environment (IDE): Unity comes with an integrated development environment (IDE) that allows you to write, debug, and test your code all in one place.
Upgrading your computer
If your computer doesn’t meet the minimum hardware requirements for game development, you may need to upgrade it. This can be done by adding more RAM or replacing the graphics card. It’s important to research the specific upgrades that will work best for your computer and budget.
Choosing the right tools and plugins
Unity has a wide range of tools and plugins available that can help you speed up development and improve game performance. In this section, we will cover some of the most popular tools and plugins used in game development:
- Visual Studio Code (https://code.visualstudio.com/): A popular text editor for game developers that supports C and JavaScript.
- Git (https://git-scm.com/): A version control system that allows you to manage your code and assets.
- Unity Asset Store: A marketplace for buying and selling game assets and plugins.
- Photoshop and Illustrator: Graphics editing software used for creating game assets.
- Substance Painter: A texture painting software used for creating game textures.
- Cinema 4D: A 3D modeling and animation software used for creating game assets.
- Final IK: An animation plugin for Unity that allows you to create realistic character animations.
- Post-processing stack: A set of plugins that can be used to improve the visual quality of your game.
Chapter 2: Designing your Game
Once you have set up your development environment, it’s time to start designing your game. In this section, we will cover the following topics:
-
Creating a game concept
-
Designing game assets
-
Setting up gameplay mechanics
Creating a game concept
Before diving into the world of game design, you need to have a clear idea of what your game is all about. This includes the game genre, setting, characters, and story. In this section, we will cover some tips for creating a compelling game concept:
- Brainstorm ideas: Write down as many ideas as you can think of and then narrow them down to one or two that stand out.
- Conduct research: Research similar games in your genre to see what has been done before and what is unique about your concept.
- Create a game plan: Outline the key features, mechanics, and objectives of your game.
- Test your idea: Share your game concept with friends or family and get feedback on whether it’s something they would be interested in playing.
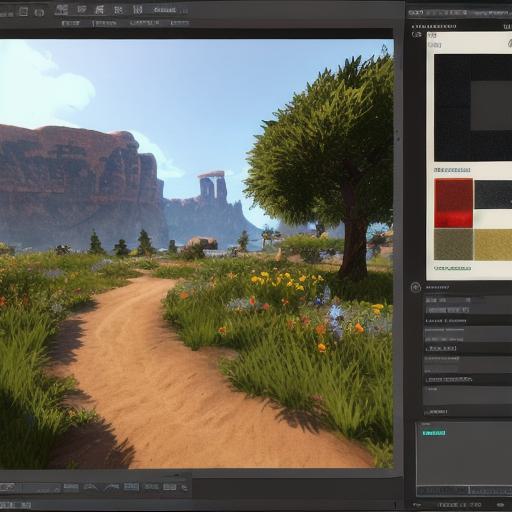
Designing game assets
Game assets are the visual elements that make up your game, such as characters, environments, and objects. In this section, we will cover some tips for designing effective game assets:
- Keep it simple: Avoid overwhelming your players with too many complex assets. Stick to simple shapes and colors.
- Use textures: Apply textures to your assets to give them a more realistic look.
- Optimize for performance: Make sure your assets are optimized for game performance, especially if you’re targeting mobile devices or older computers.
- Reuse assets: Look for ways to reuse assets in different parts of your game to save time and resources.
Setting up gameplay mechanics
Gameplay mechanics are the rules and systems that govern how your game works. In this section, we will cover some tips for creating effective gameplay mechanics:
- Define objectives: Clearly define the objectives of your game and how players will achieve them.
- Create a system of rewards and punishments: Reward players for achieving goals and punish them for failing to do so.
- Test and iterate: Test your gameplay mechanics with friends or family and iterate on them based on their feedback.
- Keep it fun: Make sure your game is fun and engaging for players, even if it’s challenging.
Chapter 3: Writing Code in Unity
Now that you have designed your game, it’s time to start writing code in Unity. In this section, we will cover some basic programming concepts used in game development:
- Variables: Variables are used to store data in your code. For example, you could use a variable to store the position of a character or the speed of an object.
- Data types: There are several data types you can use in Unity, including integers, floats, strings, and booleans.
- Operators: Operators are used to perform operations on variables, such as addition, subtraction, multiplication, and division.
- Control structures: Control structures are used to control the flow of your code. For example, you could use an if statement to check if a condition is true or false.
- Functions: Functions are used to group together code that performs a specific task. For example, you could create a function to move a character based on user input.
- Debugging: Debugging is the process of finding and fixing errors in your code. Unity has a built-in debugger that allows you to step through your code and see the values of variables.
- Version control: Version control software like Git can be used to track changes to your code and collaborate with other developers.
Chapter 4: Creating Animations in Unity
Animations are an important part of game development, as they bring characters and objects to life. In this section, we will cover some basics of creating animations in Unity:
- Sprite sheets: Sprite sheets are images that contain multiple sprites (small images) arranged in a grid. Unity supports the import of sprite sheets, which can be used to create animations for 2D games.
- Animation clips: Animation clips are used to define the movements and actions of an object or character in a game. You can create animation clips by recording the movements of an object or character and then importing them into Unity.
- Animator controllers: Animator controllers are used to control the playback of animation clips in your game. You can create animator controllers by defining the different states and transitions that your objects or characters will go through.
- Motion capture: Motion capture is a technique used to record the movements of real-world actors and use them to animate virtual characters. Unity supports motion capture data from various sources, including OptiTrack and Vicon.
- Timelines: Timelines are visual representations of animation curves that allow you to control the speed and timing of animations in your game. You can create timelines by defining keyframes and easing curves for your animations.
Chapter 5: Creating Sound Effects and Music in Unity
Sound effects and music are crucial elements of game design, as they help to enhance the overall experience of the game. In this section, we will cover some basics of creating sound effects and music in Unity:
- Audio clips: Audio clips are used to store sound files that can be played in your game. You can import audio clips from various sources, including WAV, MP3, and OGG files.
- Sound sources: Sound sources are objects in your game that emit sound effects or music. You can attach sound sources to your characters, environments, or other objects in the game world.
- Audio groups: Audio groups allow you to group together multiple sound sources and control them as a single unit. This is useful for creating complex soundscapes with multiple layers of audio.
- MIDI sequences: MIDI sequences are used to create and edit music in your game. You can import MIDI files or compose original music using MIDI software.
- Audio mixers: Audio mixers are used to control the volume, pitch, and other parameters of sound effects and music in your game. You can create multiple audio mixers to manage different types of audio content.
Chapter 6: Publishing Your Game
Finally, it’s time to publish your game! In this section, we will cover some basics of publishing games on various platforms:
- Unity Hub: Unity Hub is a free tool from Unity Technologies that allows you to manage and publish your games across multiple platforms. You can use Unity Hub to build, test, and export your game for various platforms, including Windows, macOS, iOS, Android, and web browsers.
- Exporting: When you’re ready to publish your game, you’ll need to export it in the appropriate format for each platform. Unity supports a variety of export formats, including .exe, .appx, .apk, and .html5.
- Submission process: Each platform has its own submission process for publishing games. For example, you’ll need to submit your game to the Apple App Store if you want to publish it on iOS devices.
- Certification: Some platforms require certification of your game before it can be published. For example, you may need to get your game certified by Apple’s App Review team before it can be published on the App Store.
- Marketing and promotion: Once your game is published, you’ll need to market and promote it to attract players. This can include social media advertising, influencer partnerships, and PR outreach to gaming websites and blogs.